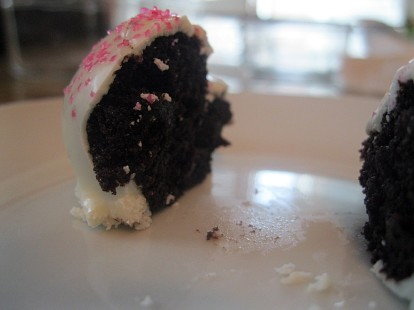
This week, I decided to make Cake bites. They’re kind of like truffles except they’re made with cake and icing, and dipped in chocolate. Yeah I know- DELICIOUS. I’ve been dying to make them ever since I first saw them in a YouTube video, and now seemed like the perfect time.
Cake bites are so in right now. Everyone’s making them. Even if you haven’t tried them yet, you’ve probably at least seen them around or heard about them. Most people refer to them as “cake balls,” but my dirty mind just refuses to call them that. I mean, cake balls? Honestly? *Cringe.*
Anyway, back to the recipe. If you want to make cake bites, you’re in luck. You’ll need very few ingredients. Except when it gets time to make the cake bites, things will get a little messy, so roll up your sleeves and let’s get creative!
Ingredients:
- Already-baked cake (I used chocolate cake mix).
- One package of store-bought icing
- Chocolate for dipping
- Decorating icing, candy, nuts, sprinkles, or any other toppings you want to sprinkle on top
Directions:
Line a baking sheet with waxed paper (or aluminum foil).
Start off with an already-baked and cooled cake. Crumble the cake into a large bowl.
Add about half the package of icing (I used chocolate icing) and then mix using a large spoon. Keep adding icing until you like the consistency of the mix. I ended up using the entire box. Use your hands to mix until you end up with a dough-like mixture.
Next, take an ice-cream scoop and scoop little balls from the mixture. Shape the balls with your hands till you get that perfect circle-y shape. Of course, I obsessed over the roundness of the balls- they have to be perfectly round to pass the test. Oval-shaped or lumpy balls just won’t work. Anyone else feel like this conversation is starting to get dirty again? *Awkward cough.*
Anyway, back to the cake balls bites. Put your cake bites in the freezer for about 10 minutes, so they firm up a bit and they’re easier to work with. If you’re making a lot of cake bites, only take a few of them out of the freezer at a time.

The cake balls, after they were chilled in the freezer for a bit. They look kind of messed up because I dropped the pan as I was taking it out of the freezer *fail*
Next, melt your dipping chocolate. I melted my chocolate over the stove, by placing the chocolate in a heat proof bowl which I put over a saucepan with simmering water. Or you could melt the chocolate in the microwave. This part was a pain in the butt because the GODDAMN chocolate wouldn’t melt. Well it did, but it was so thick and gooey. Note to self: Next time, get the chocolate melting wafers. The white chocolate melted fine, because I used white chocolate melting wafers, but the semi-sweet chocolate brick refused to melt to a good consistency. So I added some milk to the chocolate to try and thin it out, and it all went downhill from there. The chocolate started becoming dough-like! Trust me, it was not fun to work with.
Dip your cake bites into the chocolate, one at a time. I found it really hard to do this, and also, to get the excess chocolate off. I used a fork to position the bites and a spoon to drizzle the chocolate over them to make sure they were evenly covered.
Place the cake bites on the waxed paper and sprinkle any toppings you want over it. I sprinkled colourful sprinkles over mines. SO CUTE.
Note: Try to do this quickly, before the chocolate dries.
Tip: You can make cake pops instead of cake bites. Simply dip a lollipop stick into the melted chocolate and then insert it into a cake bite before you dip it. To keep the pops standing up, poke a few holes into an upside down carton or cardboard box or use a Styrofoam block and poke the sticks inside.
Once you’re done, place the cake bites back onto the wax paper to dry. Once they’re done drying, INDULGE yourself in chewy chocolate-y goodness. Mmmm. Cake bites, je t‘aime. I loved the soft, fudgy cake-and-icing mixture inside. In my opinion though, they were a bit too sweet. I couldn’t eat more than one. I think I shouldn’t have added the whole package of icing. Also, next time I will be using chocolate melting wafers instead of a huge-ass brick of chocolate. Honestly, that one mistake kind of ruined my mood while making the cake bites. They were such a pain to make, and I was highly annoyed the whole time. Like superkalafrajalisticespealladiciously annoyed.
Also, I still can’t get over the name “cake balls.” I can’t even say it without giggling like a little girl. And I don’t love calling them “cake bites” either. I don’t know why, but for some reason it seems like they were just meant to have better names to accompany their oh-so-good-ness. Please let me know if you have any suggestions for a name for these things. Please? I’m desperate.
Take care and I’ll see you soon my loves!
Le photos:


I absolutely love your blog, especially the comments in the directions of the recipe. Awesome job!
P.S. Love the pictures. You should work as a photographer. I should refer you for wedding photography, I’ll start by referring you to someone I was talking to today.
Keep it up. =)
Thank you kind stranger :P